Get Started
Add New Template #
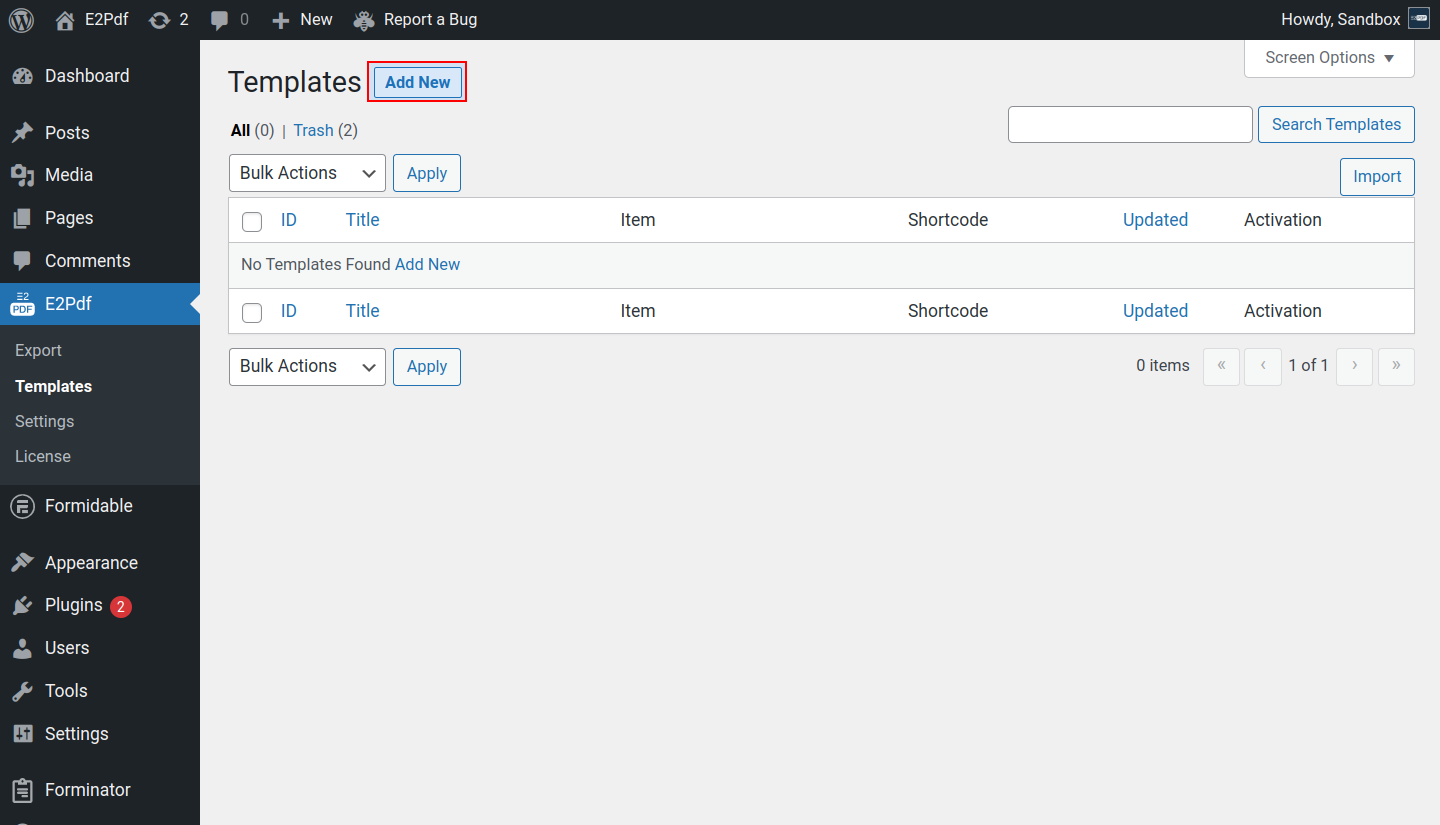
Go to E2Pdf -> Templates -> Add New

On the popup, while creating E2Pdf Template you can set preset settings as: Title, Width, Height, Font, Font Size, Line Height, Text Align, RTL option, Extension, Item, and which type of E2Pdf Template it must be created.
Extension and Item are important settings to let know E2Pdf from which data it must generate PDFs. From these settings, it will depend on where and how shortcodes can be used.
-
- If Extension is some form plugin, then the Item must be set to the form from which submissions your need to generate PDFs.
- If Extension is WordPress / WooCommerce - then the Item must be set to the post type from which you need to generate PDFs.
-
- Empty PDF - create completely empty E2Pdf Template.
- Upload PDF - create E2Pdf Template from the pre-made PDF. It will be possible to control PDF fields and add any new E2Pdf Elements but no control yet on other PDF objects in pre-made PDF.
- Auto PDF - create a draft E2Pdf Template with mapped fields depending on E2Pdf Template's Extension and Item.
Add, Edit Fields and Elements #
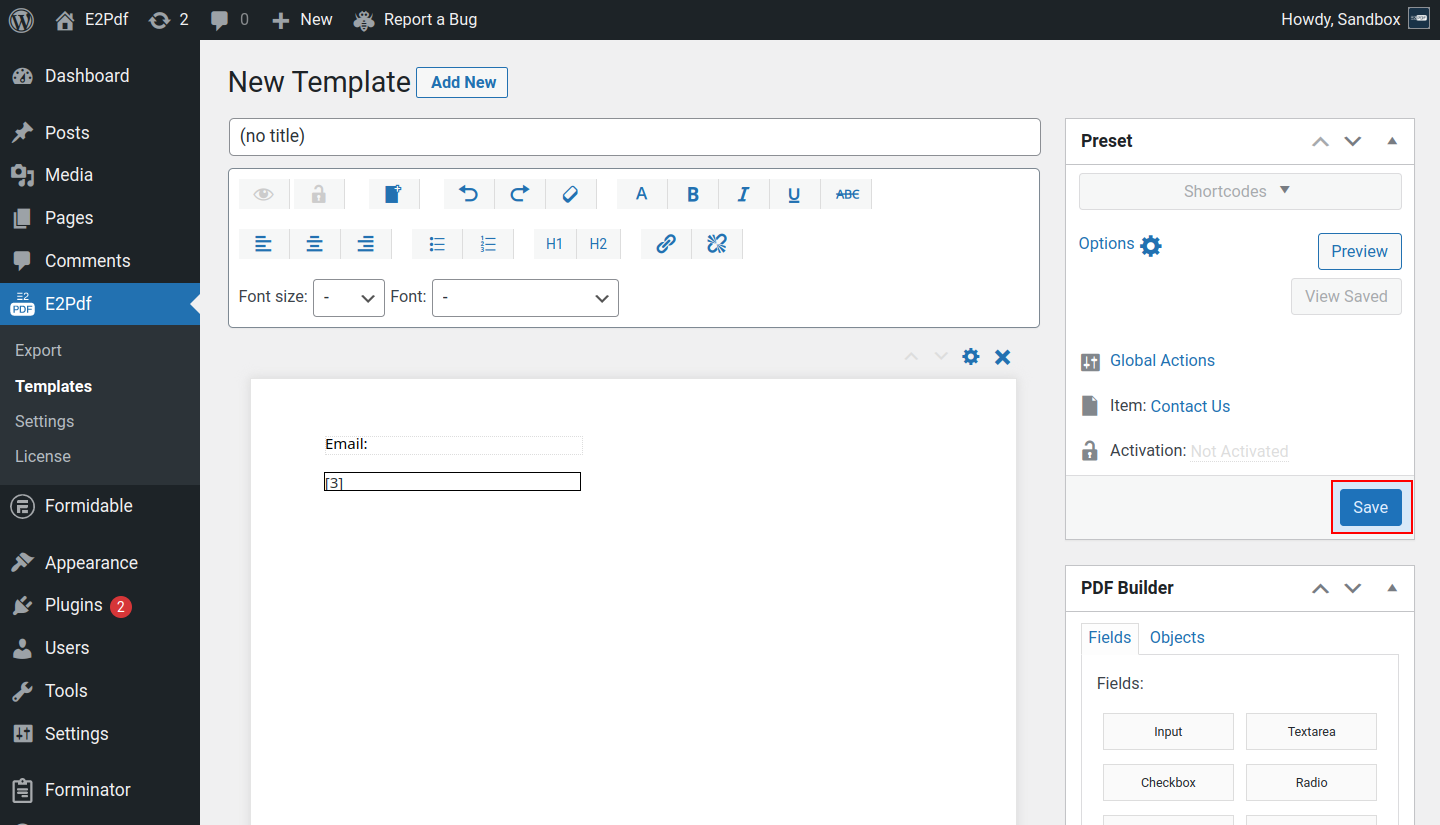
Elements inside E2Pdf Template can be placed via Drag&Drop from the PDF Builder panel. Interaction with elements can be done with a "simple" mouse control way.
Map Fields and Elements #
Map Fields with Visual Mapper or Manually. In most cases, E2Pdf supports syntax from 3rd party plugin integrations. Mapping fields can be done manually with the "syntax" of integration or with Visual Mapper. Visual Mapper can be called via Right-click on the element -> Map. It will be shown elements depending on the Extension and Item. You will need just to click on a required element in Visual Mapper to Map it to the Element inside E2Pdf Template.
Save Template #
After elements will be added and mapped we are ready to save E2Pdf Template. It can be done by the button Save / Update inside Preset MetaBox.
Activate Template #
Check E2Pdf Template Activation. If it has not been activated, activate it.
Use Shortcodes #
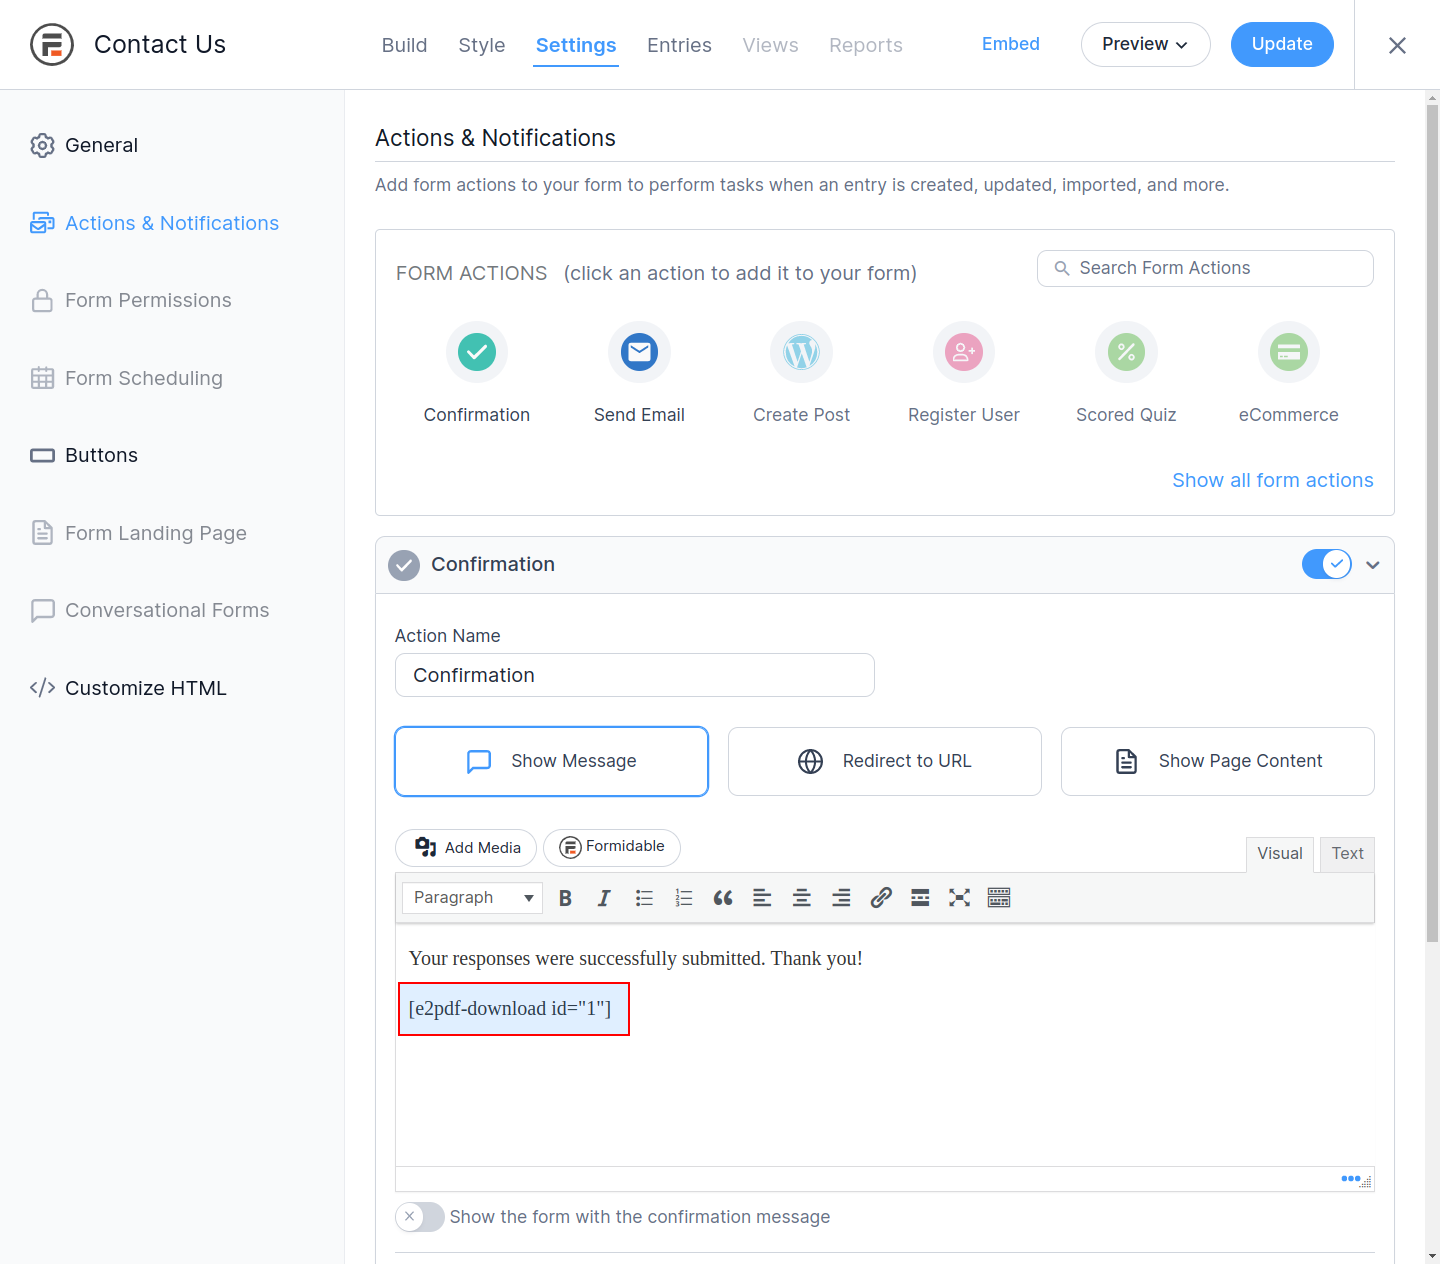
When E2Pdf Template will be saved / updated - we can use the Shortcodes menu to copy the required shortcodes. In the current example, we will use [e2pdf-download] shortcode to generate the PDF download button after form submission.
Put E2Pdf Shortcode. The shortcode must be placed depending on the shortcode, selected Extension, and Item. In our case, we will place it inside the Success Message of the form.
- See how to use global shortcodes with different extensions: Caldera Forms, Contact Form 7, Divi Contact Forms, Elementor Forms, Formidable Forms, Forminator Forms, Gravity Forms, WooCommerce, WordPress.
Testing #
Tips #
- For the fastest tests, it's recommended to use the "E2Pdf" -> "Export" backend page to debug PDF output while updating and mapping E2Pdf Template.

